Welcome back for Part 11 of this System Center VMM series, in this post I will talk to you about Bare Metal Deployment. In all the previous posts i have been talking about things that needs to be ready before you can do Bare Metal Deployment(BMT).
BMT is how you deploy physical Hyper-V hosts with VMM. It relies on a WDS server, drivers, a physical computer profile and all the other things the last 10 posts have covered.
When doing BMT you can either use the GUI version or create a PS script to deploy. I only use the PS way as it gives you more flexibility to deploy, but lets look at both.
FYI i always recommend prestaging the Computer object in the right OU before deploying, so that group policy’s can take affect from the start.
GUI
Let’s have a look at the GUI way first.
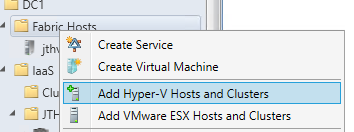
Right click a host group and click on add Hyper-V Hosts and Clusters
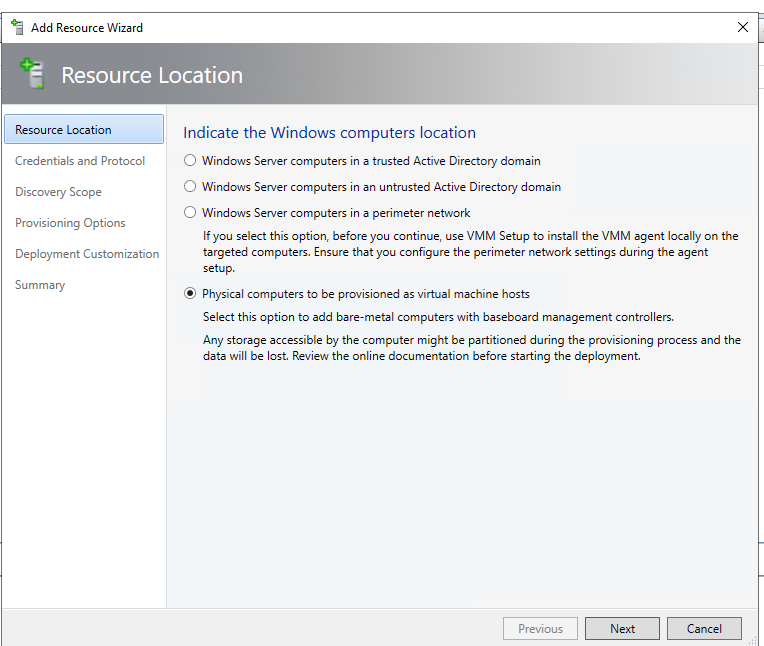
Once inside choose Physical Computer to be provisioned as virtual machine hosts.
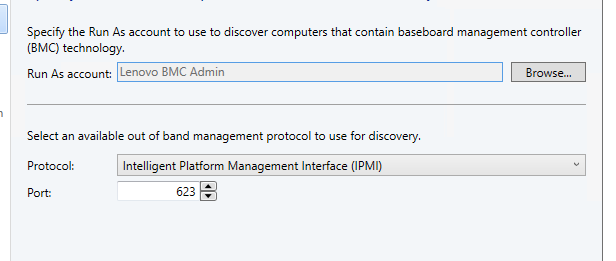
Choose the run as account you specified to login to the IPMI/BMC/ILO/iDRAC interface. FYI on some hosts you need to enable IPMI first.
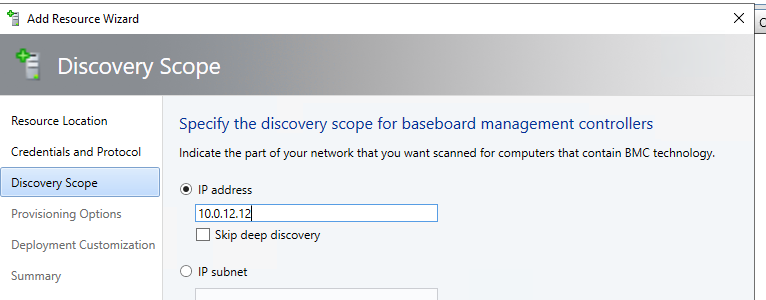
Click next and add a IP address then click next to do a deep discovery. This will boot the machine in to PXE and collect information about the server.
Once you click next it will start the deep discovery of the Physical Machine. This will boot the machine, if you have not set it to first boot to PXE, remember to press F12 or what it is on your system to get the boot menu during boot.

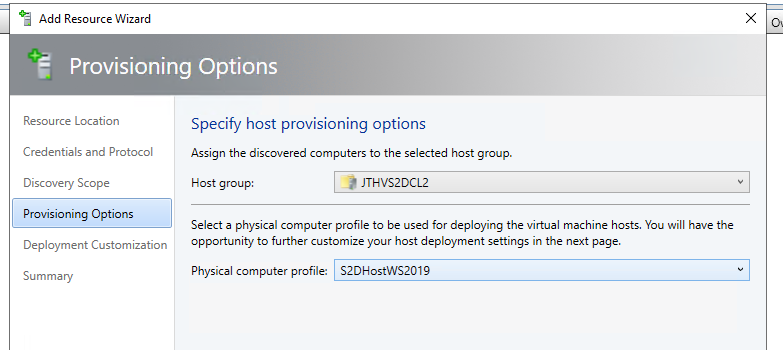
Once that’s done move to next step, choose your Host group you are deploying the Host to, and the Physical Computer Profile.
Now we need to wait for the Deep Discovery to finish before we can continue.
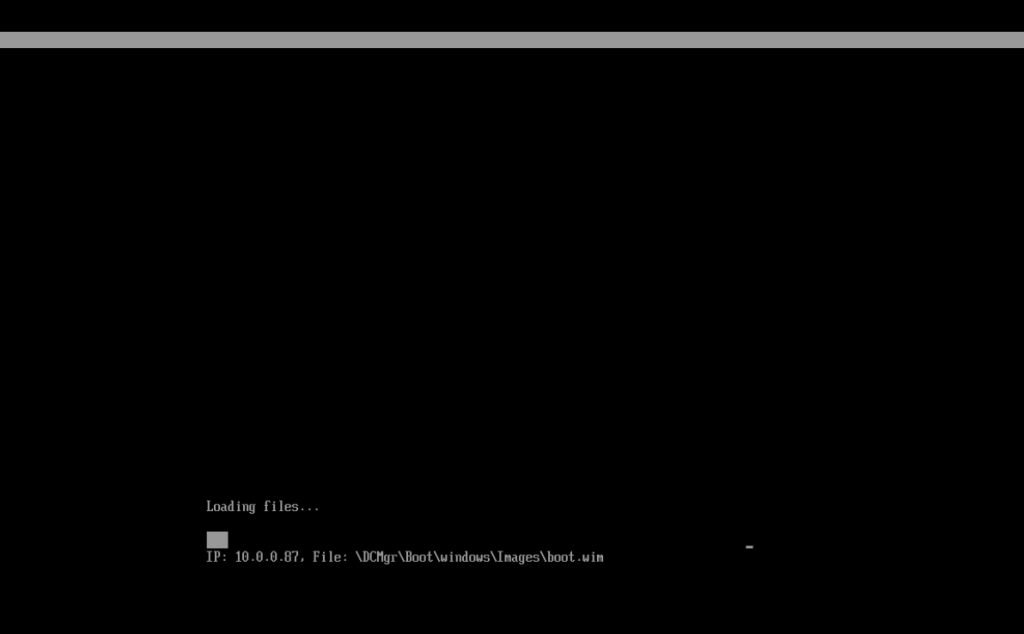
This is how PXE boot looks like
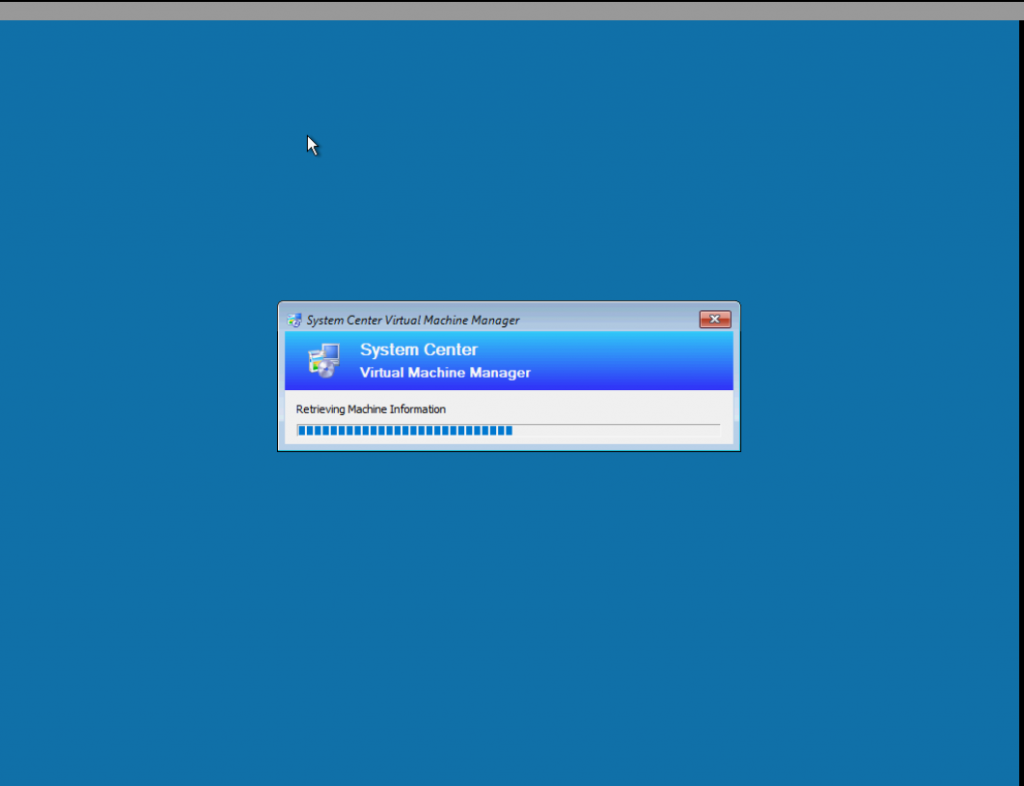
Deep Discovery doing it’s thing, identifying the local HW.
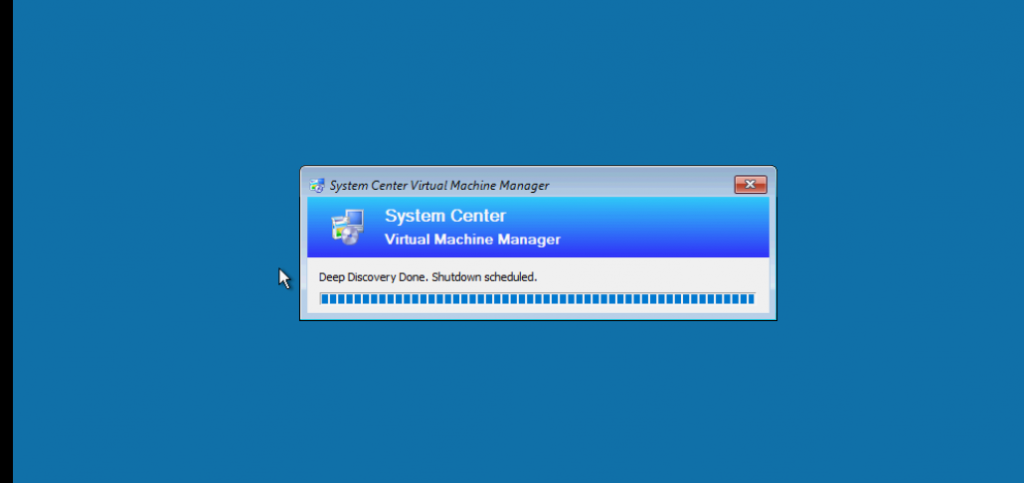
And it’s done.
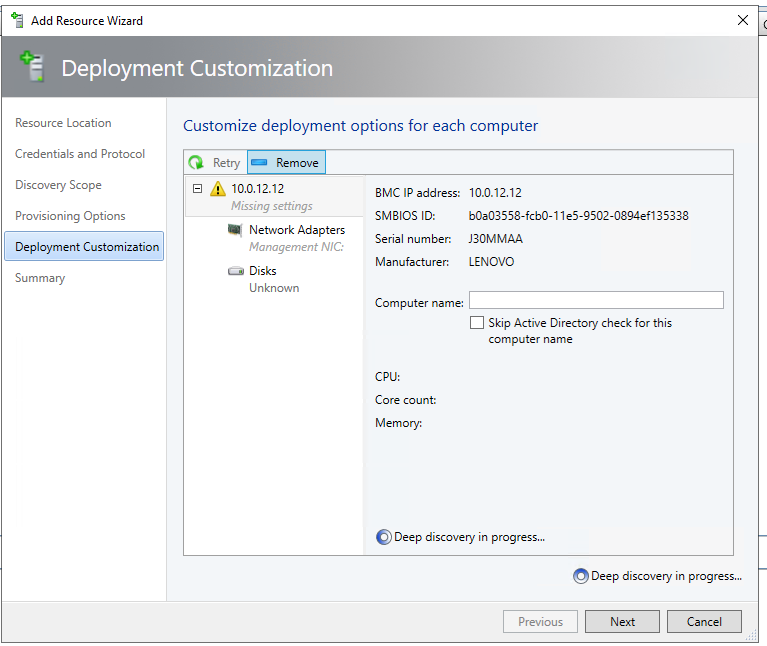
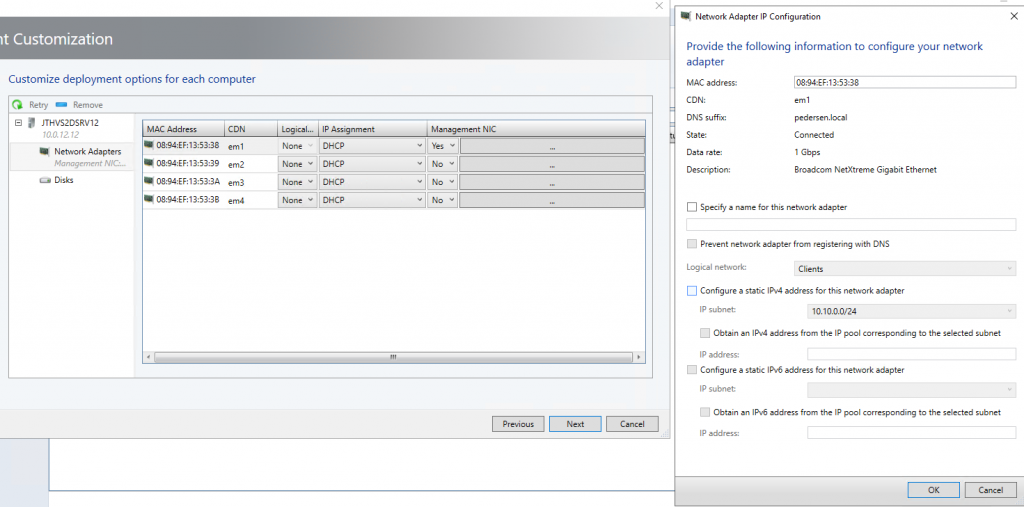
Now that it’s done it will show you information for your Physical Nic’s, and if you need to configure a Static IP you can do that. Or a logical Switch.
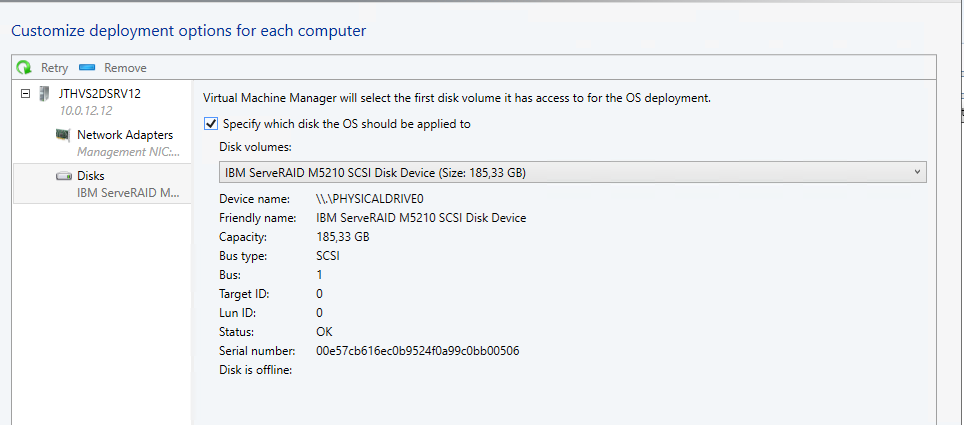
Define which disk the OS should be applied to.
Now that these things are defined you can click on next, and you will get a nice summary, and a View Script button on top. Which you can use to create a deployment of your own.
# Get Host Group 'JTHVS2DCL2'

$HostGroup = Get-SCVMHostGroup -ID "ae818f96-9bb3-47d8-9ac5-94fe48796e51"

$RunAsAccount = Get-SCRunAsAccount -ID "842a06d1-9129-4fad-8487-1e216d85c245"

# Get Physical Computer Profile 'S2DHostWS2019'

$PhysicalComputerProfile = Get-SCPhysicalComputerProfile -ID "97882437-b858-4396-bca1-c66430803796"


$NetworkAdapters = @()

$NetworkAdapters += New-SCPhysicalComputerNetworkAdapterConfig -UseDhcpForIPConfiguration -SetAsManagementNIC -SetAsPhysicalNetworkAdapter -MACAddress "08:94:EF:13:53:38"


$NetworkAdapters += New-SCPhysicalComputerNetworkAdapterConfig -SetAsGenericNIC -SetAsPhysicalNetworkAdapter -UseDhcpForIPConfiguration -DisableAdapterDNSRegistration $false -MACAddress "08:94:EF:13:53:39"


$NetworkAdapters += New-SCPhysicalComputerNetworkAdapterConfig -SetAsGenericNIC -SetAsPhysicalNetworkAdapter -UseDhcpForIPConfiguration -DisableAdapterDNSRegistration $false -MACAddress "08:94:EF:13:53:3A"


$NetworkAdapters += New-SCPhysicalComputerNetworkAdapterConfig -SetAsGenericNIC -SetAsPhysicalNetworkAdapter -UseDhcpForIPConfiguration -DisableAdapterDNSRegistration $false -MACAddress "08:94:EF:13:53:3B"


$PhysicalComputerConfig = New-SCPhysicalComputerConfig -BMCAddress "10.0.12.12" -BMCPort 623 -BMCProtocol "IPMI" -BMCRunAsAccount $RunAsAccount -ComputerName "JTHVS2DSRV12" -Description "" -SMBiosGuid "b0a03558-fcb0-11e5-9502-0894ef135338" -PhysicalComputerProfile $PhysicalComputerProfile -VMHostGroup $HostGroup -BootDiskVolume "\\.\PHYSICALDRIVE0" -PhysicalComputerNetworkAdapterConfig $NetworkAdapters

New-SCVMHost -VMHostConfig $PhysicalComputerConfig -RunAsynchronously
Now this only works for my deployment. And rely on the deep discovery that was done before.
Powershell
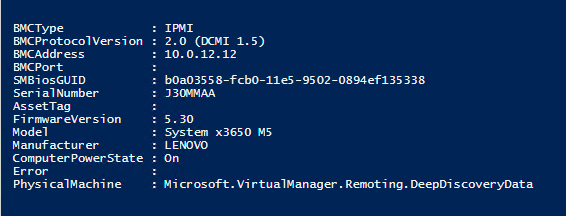
When using powershell you can easy query what HW the deepdiscovery got out.
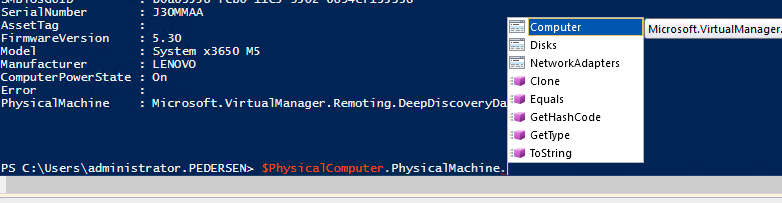
To start learning about how to script this, Jaromir Kaspar a Microsoft PFE has created a nice little lab script over at WSLAB for Bare Metal deployment. I will share some out takes from that script.
Script
#There is a few commands to take with you to create your own script

Find-SCComputer

#This is used to find information like SMBiosGUID that we need for deployment and DeepDiscovery, check it out.


#To set one time boot to PXE you can use

$server = Get-PcsvDevice -TargetAddress 10.0.12.12 -ManagementProtocol IPMI -Credential (Get Run as credential from VMM)

#And then set one time boot with

$server | Set-PcsvDeviceBootConfiguration -OneTimeBootSource "CIM:Network:1" | Out-Null
Now we use DeepDiscovery to find the nics, and choose the correct one.
Find-SCComputer -DeepDiscovery -BMCAddress 10.0.12.12 -BMCRunAsAccount (The accoutn you got before) -BMCProtocol "IPMI" -SMBIOSGUID (and then the guid you found before as well)
Now Jaromir’s script contains alot of variables that needs to be put in. So go trough the script and pick out what you need to create a script. You can also ping me on our slack channel, storagespacesdirect.slack.com about help for this.
$PhysicalComputerProfile=Get-SCPhysicalComputerProfile -Name $PhysicalComputerProfileName


$HostGroup=Get-SCVMHostGroup -Name $HostGroupName


$NetworkAdapters = @()

$NetworkAdapters += New-SCPhysicalComputerNetworkAdapterConfig -UseDhcpForIPConfiguration -SetAsManagementNIC -SetAsPhysicalNetworkAdapter -MACAddress $HVHost.MACAddress


$PhysicalComputerConfig = New-SCPhysicalComputerConfig -BypassADMachineAccountCheck -BMCAddress $HVHost.BMCAddress -BMCPort 623 -BMCProtocol "IPMI" -BMCRunAsAccount $RunAsAccount -ComputerName $HVHost.ComputerName -Description "" -SMBiosGuid $HVHost.SMBiosGuid -PhysicalComputerProfile $PhysicalComputerProfile -VMHostGroup $HostGroup -BootDiskVolume "\\.\PHYSICALDRIVE0" -PhysicalComputerNetworkAdapterConfig $NetworkAdapters


New-SCVMHost -VMHostConfig $PhysicalComputerConfig -RunAsynchronously
Post BMT deployment
Once the host is deployed, you can add a Logical Switch to the server for Hyper-V and run post deployment scripts to configure your default settings so that they are identical on all hosts.
For some more script examples look at this technet blog post by MS FTE Kandavel KR
Stay tuned for the next post, where i will write about how to link your WSUS to VMM and create update baselines.
How to configure System Center VMM Part 1 – Basic Design
How to configure System Center VMM Part 2 – Host Groups
How to configure System Center VMM Part 3 – Logical Network
How to configure System Center VMM Part 4 – Port Profiles
How to configure System Center VMM Part 5 – Logical Switches
How to configure System Center VMM Part 6 – Library Server
How to configure System Center VMM Part 7 – Run As Accounts
How to configure System Center VMM Part 8 – Deployment Server
How to configure System Center VMM Part 9 – Driver Tagging
How to configure System Center VMM Part 10 – Physical Computer Profiles
How to configure System Center VMM Part 11 – Bare Metal Deployment
How to configure System Center VMM Part 12 – Update Server and Baselines
How to configure System Center VMM Part 13 – Patching Hosts
How to configure System Center VMM Part 14 – Hardware Profiles
How to configure System Center VMM Part 15 – Guest OS Profiles
How to configure System Center VMM Part 16 – VM Templates
How to configure System Center VMM Part 17 – Clouds
Interesting read. If I can get HPE IPMI to function, would love to try this. Been fighting support on why I am getting denial of service messages logged when i try to connect to the host from VMM.
Is it enabled in the ILO? You need to make sure it’s enabled on the ilo interface. It’s port 623 and the IPMI needs to be enabled for it to work.
Check the manual for the version you have.
Jan-Tore
Hi jantorep,
Is it normal to be in deep discovery in progress for over an hour?
Thanks.
João
No, what does the console say, does it boot to PXE?