Hello Everyone
I have been starting over and over on this blog post since nov 2017 wich coinsided with me chaning jobs, wich i again just did in april of 2018 to work soly with S2D, VMM, Azure Stak and other datacenter products. So i thought it was time to get this done.
Over the last 6 months or so, one of the frequently asked questions i see and get is how do i patch my Storage Spaces Direct(S2D). When it comes to patching a failover cluster with S2D enabled it is basically the same procedure that you patch any Failover Cluster, but there are certain things you need to be aware of.
There are a few ways you can patch a cluster iam going to be focusing on the 2 most common ways that people patch windows clusters
- The first way is the Manual Way and my preferred solution pr now
- With Cluster Aware updating
- Or if you don’t want it to be manual and don’t trust CAU you create your own patch solution with scripts and some kind of automation with reporting. This is where i will be going in the future. More on that in a later blog post.
I will cover both ways of doing this and cover the important things to keep an eye on when patching either manually or with CAU.
How we did it before
Normally when you patch a Failover Cluster you do the following.
- Pause the node and drain it of any roles running on that node. And it moves any cluster resources like CSV’s and pools to other nodes that are up.
- Do your patching, firmware or driver updates
- Boot the server
- Once the server is back up you resume the nodes and the services fails back
- Then you do step 1 – 4 again.
How does Storage Sync work in a S2D scenario
Now things are abit different with S2D as you are doing HyperConverged or Converged, and your storage is spread out over several nodes from 2-16 nodes. When you reboot a node during patching, all storage writes that happens will not be written to this node. When the node is back online again S2D will trigger a sync of the data that was written on the other nodes to replicate out the mirror or parity bits that is missing on the node that was booted. It starts a repair job of the virtual disks to make sure that in a 3 way mirror all data is copied out on 3 different nodes. As 1 node is down, in a 3 way mirror there will be blocks that are not 3 way mirror until the node is back up and the repair of the virtual disk is finished. You can see these jobs with the command Get-StorageJob.
You will need to wait for these jobs to finish before you can pause another node. Depending on your solution and size of changes, this can take from minutes to several hours.
As of September 2017 changes where made to how the synchronization of data to the Paused node is done.
Pre September 2017 when the node was paused, all storage write IO(Changes) was not synchronized to the node that was in maintenance. And the disks for that node was in Storage Maintenance mode. With the change, there was a bug going from August to September patch causing you to manually run a command to resume the disks from Storage Maintenance mode as the Nodes disks where not taken out of Storage Maintenance. You would need to run the bellow command.
Repair-ClusterS2D -Node "name of node" -DisableStorageMaintenanceMode
What happens now is that when you pause a node, all changes will still be synchronized to the node while it’s in a Pause state. To fully set the disks in Maintenance mode, you will need to run this command.
#There are 2 ways of doing this either choose the node or the storage enclosure
Get-ClusterNode -Name "name of node" | Enable-StorageMaintenanceMode
Get-StorageEnclosure -FriendlyName "name of storage enclosure" | Enable-StorageMaintenanceMode
You might need to use the Unique ID for the storage enclosure for getting it to work.
For normal patching this is not needed. I have done HBA firmware and driver upgrades without any issues. But i always recommend to do this outside of business hours. And always have a backup, Murphy might hit you in the head. And id rather not be the person telling the CEO that the most important system they had went down as you where doing patching during day time.
The manual way of patching
This is my preferd way of doing it right now, but stay tuned for an update on how to create a fully automated script some time in the future.
Manual patching requires a user to do steps and to check in from time to time during patch cycle. And the steps are as follows
- Pause and drain nodes of any CSV’s if it’s a HyperConverged it will also move all VM’s off the node.
- Start Windows patching or driver/fw upgrades as soon as the node is Paused
- Reboot node when you or Windows Updates are done
- Once the node is back up and added back to the cluster you can Resume and fail back the resources that was on the node. CSV’s require a manual move back.
- Now check the storage jobs with Get-Storagejob
- Once all Storage Job’s are done and all virtualdisks are Ok and Healthy you can move on to the next node.
- So repeat the steps until you are done patching.
Some tips when patching, there have been reports of CSV’s and VM’s going into pause mode as a node is being rebooted. There is no good explanation to why this is, but the best guess is some mismatch in binaries between the prev patch and new patch causing the CSV to have a short 1 sec pause. Which also causes the VM’s to pause for that same time. This can be annoying but will not cause any problems for your VM’s as of 2016 VM’s can go into auto pause if it looses connectivity to the storage. It’s like if you manually pause a VM, but it will auto start the vm again once it has access to the storage again.
The CAU way
Cluster Aware Updating has been around for quite a few years and a lot of people use this for patching any kind of Windows Server Clusters. For S2D it’s not the best thing in the world. It patches your servers without any interaction. But it has no alerting if anything goes wrong. It respects the cluster health alarms so it will stop, but it can leave your cluster unhealthy without alerting you. When setting up CAU you have the options of defining how many nodes can be unhealthy before it stops. In anything less then a 8 node, that number needs to be max 1. From 8 to 16 nodes it can be 2. But what happens if node 1 and 2 fails. It stops and you will need to figure out what’s wrong. Now the issue here is you have 2 nodes down and not working properly. What happens if a 3rd node goes down. In any scenario it will cause problems. So my recommendation is to leave it at 1 failed node before stopping if you wan’t to run CAU.
The most important thing here is to have some alerting either via SCOM, a powershell script or something else that will alert you if there are issues. And also to keep an eye on the patching. Like i said you don’t need to do anything if everything goes ok. But you will still need to keep an eye on the patching process and see if all is ok.
So how do you configure CAU, it’s a pretty simple process, and do not have too many options to tick off. Make sure RSAT-Clustering-AutomationServer and the other Clustering tools are enabled before you start CAU configuration.
Right click the cluster name in FCM and go to more actions and Cluster-Aware Updating

Then you will get this picture, here click on the Analyze cluster updating readiness
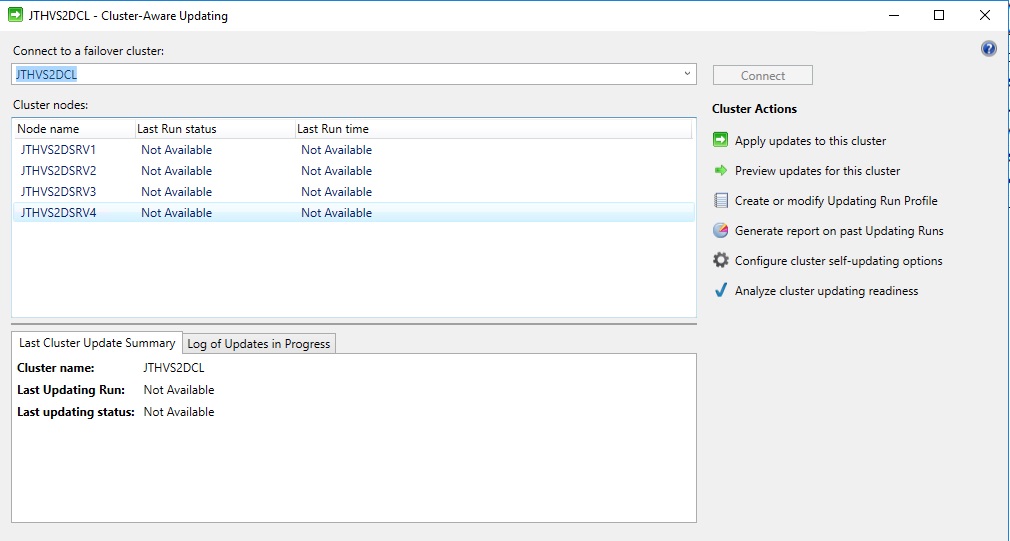
This cluster did not have the tools or the CAU role installed so it was giving some warnings. The CAU role is setup during the first CAU configuration.

Click on Configure cluster self-updating options
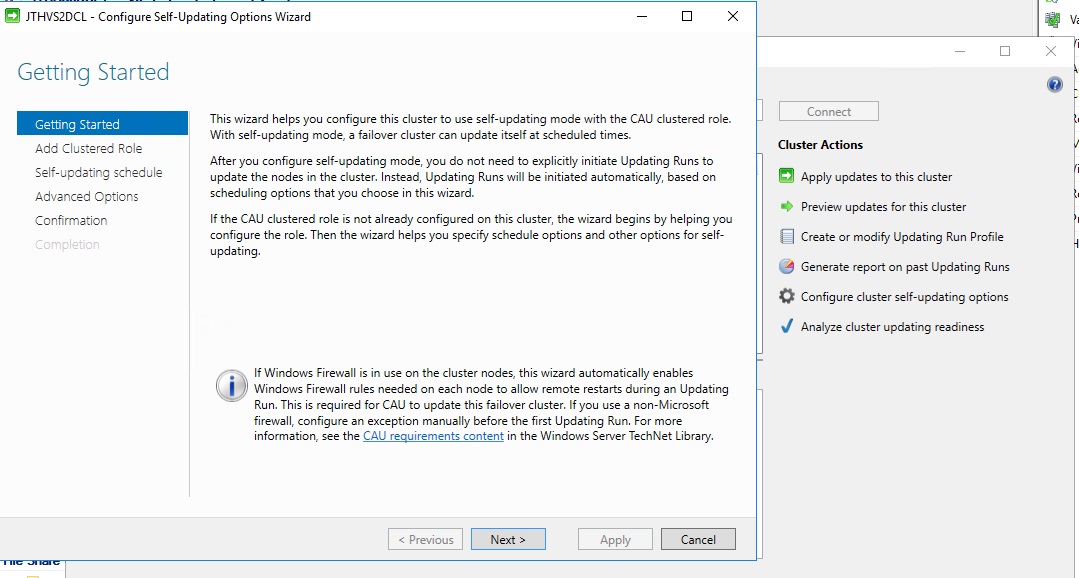
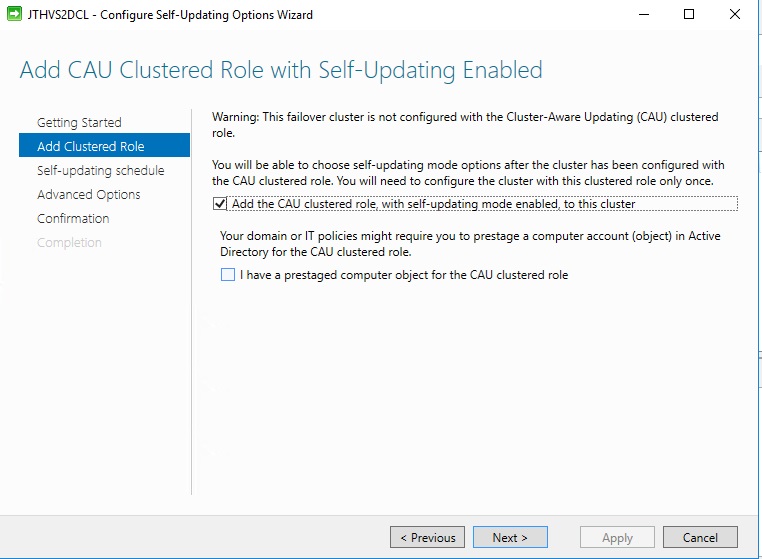
Click next and enable the CAU role during installation. Then next again
Define your schedule when you want it to patch.
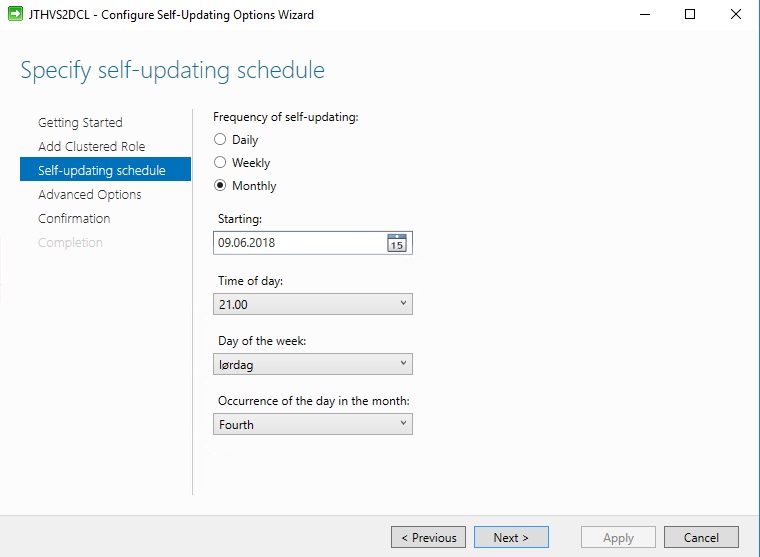
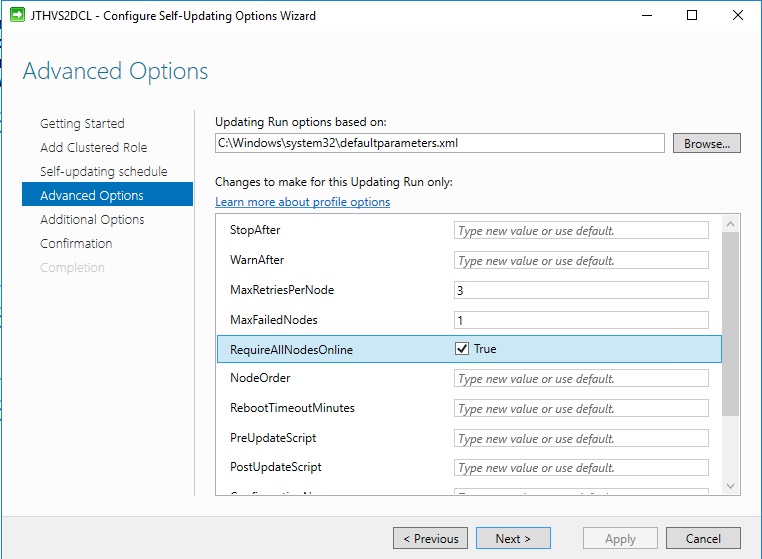
On this page the most important steps are. Make sure you set the MaxFailedNodes to 1 and to RequireAllNodesOnline to be checked. You can also define in which order the nodes are to be patched. And you have the option of running pre and post update scripts for some notification and check solution with CAU.
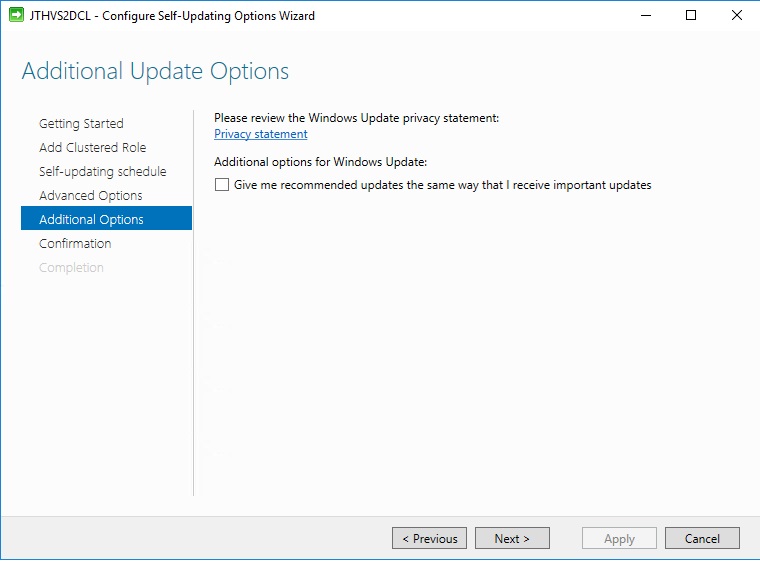
In this next page you can specify if you want windows update to install recommended updates as well.
And in the last Window we apply the configuration script for CAU and we are done.

Now you can just sit back and relax and come back Monday morning and hope everything is ok. Or like i would do check in from time to time and see what is going on.
Both way’s will require you to pay attention to what is going on. The manual way do require more hands on but it gives you more flexibility if something happens.
Great acticle
When I manually set the disks of the pause-node into maintenance mode (using : Get-ClusterNode -Name “name of node” | Enable-StorageMaintenanceMode), this will kick-off a rebalance/optimize job. Is it ok to manually stop these jobs, since I know the pause-node will come back in 10 minutes anyway after reboot ? Rebalance seems useless to me if the node comes back.
I have had a situation where setting the disks of 1 node in maintenance mode, kicked off a huge IOPS storm for the rebalance jobs. For which I had to wait hours for to finish.
Greetz
RW
I have not used the Enable-storagemaintenance mode at all when patching. But i do belive i have been lucky tho. It should not kick off any jobs. As it’s supposed to stop all storage jobs 🙂
If you are on CU11 or newer you don’t need to set storagemaintenance mode.
JT
We have a 6 node hyper-converged cluster and have had the same maintenance issues. I will try this in the next few days. Newly Published MS node shutdown workaround here:
https://support.microsoft.com/en-us/help/4462487/event-5120-with-status-io-timeout-c00000b5-after-an-s2d-node-restart-o
Yes know about it 🙂
Thanks for replying.
JT
Very nice info here! We broke our setup already 3 times not waiting for storagejobs to finish.
Looking forward to the scripted version!
Thanks
Forgetting to wait for the storage jobs is what has killed too many S2D clusters 🙁
The summer has been busy so will come with an update in the comming months 🙂
JT
Hi, just a heads up, I was unable to get the commands listed to work on my S2D cluster. In order to enable maintenance mode I had to figure out the UniqueID for each storage enclosure and pass that along to enable-storagemaintenancemode. This is on a 2 node cluster that is having the issue described in your blog. Great article other than that though, helped me fix a long standing issue!
Thanks for the update. The commands was an example, did not test it lately my self. But thanks for the update. Il add it to the post. Thanks
Jan-Tore